Tuesday, February 24, 2009

Cauliflower-Feta Pasta Bake

I certainly don't cook nearly as often as my sister, but I didn't want to let you guys go without while she was living it up in Disneyland. I love pasta but to eat it with alfredo sauce(my favorite) all the time would put on more pounds that I don't have because of my love for sugar. So I do like to try new and different recipes with pasta. This one caught my attention because to mix cauliflower and feta with pasta? It seemed strange to me. It was alright, not anything I'd make because I crave it. But when I want pasta and something different, then this is it.


I got the recipe from my Menu Planner in the Rachael Ray Magazine, March 2009 issue. I have since lost it and cannot for the life of me find it on her website, so the recipe from memory is...

3/4 pound pasta(I used small shells because its what I had)
1 head of cauliflower, cut into small florets
olive oil
14 ounce can of fire roasted crushed tomatoes
2 cups olives(I used regular black instead of kalamatas)
1/2 cup of feta, crumbled

Preheat oven to 425 degrees. Toss cauliflower and olive oil. Spread onto a baking sheet and season with salt and pepper. Roast for 25 minutes. Meanwhile, boil water for pasta and cook until al dente. Reserve 1/2 cup of pasta water, drain the pasta. Mix pasta, reserved pasta water, crushed tomatoes, olives and feta cheese together. Pour into a 13x9 baking pan. Top with roasted cauliflower. Heat in the oven at 350 degrees for 10 minutes or until dish is heated through.

I also added some shredded mozarella on the top because I like cheese. Shamelessly.

Stumble Upon Toolbar

Tuesday, February 17, 2009

Chicken Wraps

I love the chicken wraps at McDonald's. So I came up with a way to make them at home and have them me a little healthier than the McDonald's one. There are so many ways you can adjust it to your tastes and desires. Instead of lettuce I use arugula or spinach when I have them on hand or just for a different twist. I like adding tomatoes and/or pickles to the wrap. I also love having red onions on my wrap when I make it at home. I usually add some colby cheese but cheddar or any flavor works pretty well. The other way I make it different is I use homemade ranch or the Creamy Tomatillo Dressing or even a french dressing tastes really good.

tortillas
breaded chicken pieces baked in the oven until cooked
dressing
lettuce
red onion
tomato
cheese

Warm the tortilla up. Spread the dressing all over the tortilla. Sprinkle the cheese and lettuce on the tortilla. Add the tomato and onion if using. Cut up chicken into bite size pieces or leave as a whole piece if desired. Roll the tortilla into a wrap and serve.

Stumble Upon Toolbar

Monday, February 16, 2009

Chicken Paprikash II


I love this dish. It's one of my favorite from my childhood. I honestly could eat this weekly but my husband is not a huge fan of the dish. The photo does not do it justice. The coloring is much more vivid in real life. The flavor is very creamy and tasty without being an overpowering taste. I've posted a recipe on my blog for this dish before but this is my all time favorite way of making it. The recipe came from The Joy of Cooking Cookbook. I used homemade egg noodles for the dish this time but I usually make my own little tiny dumplings. Next time I plan on cutting the homemade noodles into smaller pieces so its more like the tiny dumplings.

Rinse and pat dry:
3 1/2 to 4 1/2 pounds chicken parts
Season generously with:
salt and black pepper to taste

Heat in a wide, heavy skillet over medium high heat until fragrant:
2 tablespoons butter or lard
Add as many pieces of chicken to the skillet as will fit without crowding and cook until golden on both sides, about 5 minutes. Remove the chicken to a plate and brown the remaining chicken in the same manner. Add to the fat remaining in the skillet:
3 cups very thinly sliced onions

Reduce the heat slightly. Cook, stirring, until the onions just begin to color, about 10 minutes. Sprinkle over the onions:
1/4 cup sweet Hungarian paprika
2 tablespoons flour
Cook, stirring for 1 minute. Stir in:
1 1/2 cups chicken broth
1 tablespoon minced garlic
1 large bay leaf
1/2 teaspoon salt
1/2 teaspoon ground black pepper

Bring the mixture to a boil, stirring constantly. Return the chicken with all accumulated juices to the skillet. Reduce the heat so that the liquid barely bubbles, cover the skillet, and cook, turning the chicken once or twice, until the dark meat pieces release clear juices when pricked with a fork, 20 to 30 minutes. Remove the chicken to a plate. Discard the bay leaf. Let the sauce settle, then skim the fat off the surface with a spoon. Boil the sauce over high heat until very thick, almost pasty. Remove the skillet from the heat and blend thoroughly into the sauce:
1 to 1 1/2 cups sour cream

Return the sauce to high heat and boil until thickened. Season to taste with:
salt and pepper
several drops of lemon juice

Return the chicken to the skillet and heat through. Serve with:
rice, hot cooked noodle, hot spatzle, or little dumplings

Stumble Upon Toolbar

Thursday, February 12, 2009

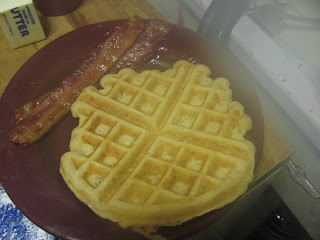
Extra Light, Extra Crispy Waffles


I have to admit this recipe has been the best tasting of all waffles recipes I've tried. It did have the crispness that my oldest loves about frozen waffles. The best part was they were no harder to make than regular waffles. I did have concerns that you'd be able to taste the rice krispie's in the waffles but you can not. This was a winner in our house and one we will make again and again. I found the recipe in the August/September 2006 issue of Cook's Country.

1 1/4 cups all purpose flour
1 cup rice krispies
3/4 cup cornstarch
1/4 cup sugar
1 teaspoon baking powder
1/2 teaspoon baking soda
3/4 teaspoon salt
2 large eggs, separated
1 1/2 cups milk
1 teaspoon vanilla extract
1/2 cup vegetable oil

Preheat traditional waffle iron to medium. Meanwhile, stir flour, rice krispies, cornstarch, sugar, baking soda, baking powder, and salt together in large bowl. Whisk egg yolks, milk, vanilla, and oil together in medium bowl.
With electric mixer of balloon whisk, beat egg whites in bowl to soft peaks. Pour milk mixture over dry ingredients and whisk until combined. Whisk in beaten whites until just combined. Do not over mix; a few streaks of whites should be visible.
Pour 2/3 cup batter into center of preheated waffle iron and use back of dinner spoon to spread batter toward outer edges (batter should reach about 1/2 inch from edges of iron before closing lid). Close lid and cook until deep golden brown, 3 to 4 minutes. Serve immediately.

Stumble Upon Toolbar

Wednesday, February 11, 2009

Easy Baked Beans


I love baked beans. However I do not always have the time nor the desire to make them from scratch. So on days like those I doctor up some canned beans and no one can tell the difference. And the best part is you can add whatever your tastes are that day. Some times I use barbecue sauce and sometimes I use ketchup. Sometimes I use bacon and sometimes I use salt pork. However you decide to do it here is the basics:
one large can Bush's baked beans (really you could use any kind but I prefer Bush's)
1 can northern beans, rinsed (again you can use any kind of beans but my preference is northern)
1/4 cup brown sugar, more if you want really sweet or less if you prefer yours less sweet
1/2 cup ketchup or barbecue sauce, more or less depending on you
about 8 slices bacon or a piece of pork salt, chopped
1 onion, chopped

Fry the chopped bacon or salt pork. About halfway through cooking them add the chopped onion. After meat is cooked and onions soft add the beans. Then add the sugar and ketchup or barbecue sauce. Bring to a bubble then simmer for 15-20 minutes.

Stumble Upon Toolbar

Tuesday, February 10, 2009

Lexington Style Pulled Pork

All I can say is yummy. This dish is worth the time to make. My husband is still asking if there is leftovers. And the smell from cooking this had neighbors over most of the cooking time asking what I was making. The recipe came from the August/September 2006 magazine. The bbq sauce that you make for this is different from regular bbq sauces but really does taste good with this pork.

Spice Rub and Pork
2 tablespoons paprika
2 tablespoons brown sugar
2 tablespoons black pepper
1 tablespoon salt
1 (4 to 5 pound) boneless pork shoulder roast
4 cups wood chips

Lexington BBQ Sauce
1 cup water
1 cup cider vinegar
1/2 cup ketchup
1 tablespoon sugar
3/4 teaspoon salt
1/2 teaspoon pepper
1/2 teaspoon red pepper flakes

For the spice rub and pork: Combine spices, sugar, and salt in a small bowl, breaking up any lumps as necessary. Massage entire pork with spice mixture. (Roast may be wrapped tightly and refrigerated for up to 1 day.)
Soak wood chips in bowl of water to cover for 15 minutes. Open bottom grill vents. Light chimney starter filled halfway with charcoal briquettes (about 50 coals) and burn until charcoal is covered with fine gray ash. Pour coals into pile on one side of grill and scatter wood chips over coals. Set cooking grate in place, cover, and let grill heat up 5 minutes. Scrape grill clean.
Position pork on cooler side of grill. Cover, positioning half open lid vents directly over meat, and cook until meat has a dark, rosy crust and charcoal spent, about 2 hours.
Meanwhile, adjust oven rack to lower middle position and heat oven to 325 degrees. Transfer pork to large roasting pan and wrap pork tightly in foil, and roast in oven until fork inserted into pork can be removed with no resistance, 2 to 3 hours. Remove from oven and rest, still wrapped in foil, for 30 minutes.

For the sauce:
Whisk together all ingredient until sugar and salt are dissolved. Using hands, pull pork into thin shreds, discarding fat if desired. Toss pork with 1/2 cup vinegar sauce, serving remaining sauce at table.

Using a Gas Grill:
Seal 4 cups soaked wood chips in foil packet. Place packet on primary burner of gas grill, turn all burners to high, and preheat with lid down until chips are smoking heavily, about 15 minutes. Turn primary burner to medium and shut off other burners, adjust temperature of primary burner as needed to maintain average temperature of 275 degrees. Position pork over cool part of grill. Barbecue as directed.

Stumble Upon Toolbar

Monday, February 9, 2009

Barbecued Macaroni Salad

I found this recipe in the August/September 2006 issue of Cook's Country. I decided to make this for the big birthday diner I was planning since I was looking for a different type of pasta salad and one that I had all ingredients on hand for. At first I thought this fit the bill and then while making it I began to worry that no one would like it. My first taste of it I thought I made a huge mistake but I placed it in the fridge and let the flavors meld together. What a difference two to three hours made because after trying it again a few hours later it was so good. I made the salad the night before and by the time I served it was really really good. It was a little spicy with some bites but overall it was a fun recipe to try. My husband really liked the salad and can not wait for me to make it again. The recipe does call for elbow macaroni but I did not have any on hand so I used shells.

salt
1 pound elbow macaroni
1 red bell pepper, seeded and chopped fine
1 rib celery, chopped fine
4 scallions, sliced thin
2 tablespoons cider vinegar
1 teaspoon hot sauce
1 teaspoon chili powder
1/8 teaspoon garlic powder
pinch cayenne pepper
1 cup mayonnaise
1/2 cup barbecue sauce
pepper

1. Bring 4 quarts water to boil in large pot. Add 1 tablespoon salt and macaroni and cook until nearly tender, about minutes. Drain in colander and rinse with cold water until cool, then drain once more, briefly, so that pasta is still moist; transfer to large bowl.

2. Stir in bell pepper, celery, scallions, vinegar, hot sauce, chili powder, garlic powder, and cayenne pepper, and let sit until flavors are absorbed. Stir in mayonnaise and barbecue sauce and let sit until salad is no longer watery, about 5 minutes. Season with salt and pepper and serve. The salad can be covered and refrigerated for up to 2 days. Check seasonings before serving.

Stumble Upon Toolbar

Sunday, February 8, 2009

Broccoli Cheese Soup


My husband summed up this recipe with a "best broccoli cheese soup I've ever tasted." He even asked for it to be cooked again, which considering it was a creamy and cheesy soup means that he really liked. It was so simple to cook yet tasted so good. I found the recipe here. Again another wonderful recipe from Melanie at My Kitchen Cafe. We are adding this to our rotation of soup recipes.

1 can chicken broth
1 small onion, diced

1/3 c. flour
1/4 c. butter
Pepper to taste (I used about 1/2 teaspoon)

2 c. milk (I used 1% with great results)
1 1/2 c. shredded cheddar cheese (the sharper the better for flavor - I used sharp cheddar and hopefully next time will have extra sharp cheddar on hand)
1/2 c. shredded swiss cheese
steamed chopped broccoli (the amount of broccoli really boils down to preference - I wanted a lot of broccoli in my soup, so I chopped and steamed approximately 2 1/2 to 3 cups of broccoli florets)

Simmer chicken broth and chopped onion for 15-20 minutes in a covered small saucepan, until onions are soft. Heat milk in microwave for 1-2 minutes. In a separate medium-sized stockpot, melt butter then add flour and pepper. Cook together for a couple of minutes, then whisk in warmed milk. Stir and heat together on medium-high heat until soup starts to thicken. Next add chicken broth and continue to stir until well blended. Add cheeses and steamed broccoli. Serve immediately.

Makes approximately 4 servings (with two adults and three kids, we finished the pot of soup in one dinner serving it in bread bowls, so if you are serving more adults or serving the soup in regular bowls, I would consider doubling according to the number of people)

Stumble Upon Toolbar

Saturday, February 7, 2009

Individual Seven Layer Dip


I decided on a whim to try serving a seven layer dip for dinner. While it did not turn out exactly the way I wanted it was really good and eaten by all who had dinner with us. This would be adaptable to whatever you family likes and prefers. And yes it was more like a supreme nacho than an actual seven layer dip.
Build in the following layers on your plate:
Refried Beans
Taco meat (chicken or beef would work)
cheese
guacamole
sour cream
salsa or taco sauce
fresh chopped tomatoes
chopped green onions

I then circled the dip with tortilla chips.

Stumble Upon Toolbar

Friday, February 6, 2009

Creamy Turkey with Wild Rice

This soup was really tasty. I used the last of the turkey from the turkey I made on Tuesday for the soup. I had my doubts at first with the soup since I was using a creamy chicken recipe but it turned out really good. I used a little too much curry powder but I was the only one who noticed this. I threw the turkey in after I added the mushrooms since my meat was already cooked and I believe the recipe called for raw chicken. I also did not have fresh mushrooms on hand so I used a can of mushrooms. This recipe was really quite easy to make and tasted much better than any canned soup I have tried. I halved the recipe because Melanie said it made quite a bit and I knew only three adults were eating the soup. Half of the recipe was plenty for 3 adults with an extra serving leftover. I found the recipe on Melanie's site.

Chicken and Wild Rice Soup
from Mary G.

½ cup butter
1 finely chopped onion
½ - 1 cup frozen corn (or ½ cup chopped celery, if preferred)
½ pound fresh mushrooms, sliced
½ cup carrots, sliced
¾ cup all-purpose flour
6 ½ cups chicken broth (can use 7 bouillon cubes plus 6 ½ cups water)
2 cups cooked wild rice
1 pound boneless, skinless chicken breasts, cubed
½ teaspoon salt
½ teaspoon curry powder
½ teaspoon mustard powder
½ teaspoon dried parsley
½ teaspoon black pepper
1 cup slivered almonds
2 cups nonfat half-and-half (use normal half-and-half if you prefer, but you won't believe how delicious this is with the nonfat variety!)

Melt butter in a large saucepan over medium heat. Stir in the onion, corn, chicken and carrots and sauté for 5 minutes. Add the mushrooms and sauté 3-4 more minutes. Then add flour and stir well. Transfer mixture to large pot. Over medium heat, gradually pour in the chicken broth, stirring constantly until all has been added. Bring just to a boil and then reduce heat to low and let simmer.

Next, add the rice, salt, curry powder, mustard powder, parsley, ground black pepper and almonds. Allow to heat through and then pour in the half-and-half. Let simmer 1 to 1 ½ hours. Be careful not to let the soup come to a boil or it won't thicken properly - let it simmer on low heat, stirring occasionally.

Stumble Upon Toolbar

Thursday, February 5, 2009

Turkey with rice and gravy


This was just a thrown together dish. I had left over turkey from the turkey I roasted so I shredded it and warmed it up gravy and served it with rice. Now the next day I've thought of ways to improve the dish. After cooking the rice I would have added it to the turkey and gravy. I would have added a few veggies probably celery and carrots or maybe even peas. And I would have made lots more gravy as the turkey soaked up the gravy. Overall it was not a bad dish considering I just threw the stuff together.

about 3 cups shredded leftover turkey
I used 2 servings of this gravy but I probably should have added one more:
3 cups chicken broth
2 tbsp flour
salt and pepper
1/4 cup dry milk
Put flour in jar and add one cup chicken broth and the dry milk. Shake until flour is dissolved. Meanwhile heat the rest of the broth on medium heat. Pour the flour mixture slowly into the simmering broth and stirring constantly until thickened. Add more flour if needed to reach the consistency you are looking for.
4 servings of cooked rice

Heat the turkey up in the gravy. Serve over rice.

Stumble Upon Toolbar

Wednesday, February 4, 2009

February Week One Shopping Trip/Menu Plan

Wednesday- Turkey with rice and gravy, salad, and leftover pumpkin pie
recipe
Thursday- Creamy turkey and wild rice soup in bread bowls
recipe
Friday- 7 layer dip, I'm making this for a meal we will see how it turns out
recipe
Saturday- spaghetti with salad and bread
Sunday- Southern pulled pork with baked beans and pasta salad
recipe
recipe
recipe
Monday- broccoli and cheese soup
recipe
Tuesday- chicken dish
recipe
Wednesday- pork dish

Shopping Trip

Ream's
3.75 lbs cauliflower $2.21, 59 cents lb
3 radishes $1, 3 for $1
2.76 lbs braeburn apples $1.90, 69 cents lb
2.94 lbs bananas $2.03, 69 cents lb
bakery $1.25, thanks to my helpers
clover club potato chips $1.50, thanks to the helpers
3 Mexican drinks $2.07, 69 cents each, thanks to the helpers
1.78 lb green grapes $2.23, 4lbs for $5
3 green onions $1, 3 for $1
2 turkey gravy mix $1, 50 cents each, usually I make my own but I was being lazy today
1.14 lbs green grapes $1.43, 4 lbs for $5
bacon ends $1.29
10 lbs popcorn chicken $8.90, 89 cents a lb
10 lbs pork riblets $14.50, $1.49 lb
Grand total at Reams $43.52

Kent's market
2.64 lbs broccoli $1.82, 69 cents lb
2 dozen eggs $1.98, 99 cents a dozen
24 oz sour cream 99 cents
push pop 59 cents, again thanks to some helpers
15 lbs potatoes $2.79
3.85 lbs country style ribs $3.82, 99 cents lb
6.6 lbs sirloin pork chops with bone $6.45, 98 cents lb
ground chorizo $1.93
Grand total at Kent's $21.08

Harmon's
gogurt $3.19, again thanks to my helpers
garlic bread $1.99
1/2 lb deli meat $5.19
3.14 lbs trimmed boneless skinless chicken breast $7.82, $2.49 lb
rolls $1.99
5.85 lbs ground chunk $11.66, $1.99 lb
Grand total Harmon's $32.80

Grand total for the week: $97.40, $2.60 under my $100 goal

Stumble Upon Toolbar

Tuesday, February 3, 2009

Food Storage Goals for February

I am taking a slightly different approach to this blog then I had originally planned. Don losing his job has made me think differently about how I do things. As you may have noticed last month I posted meal plans and my grocery lists. I'm going to keep doing that this month but change it a little. I'll explain it after I do my first grocery trip for the month. Also I have decided I want to strengthen my food storage. I've always felt I've done a good job but in light of our recent job loss I have discovered I could have done a better job. So at the beginning of each month I'm going to list my goals for building my food storage. I found a great book at the library and I'm going to give her plan one year and then see how well I liked her plan. The book I'm using is called Emergency Preparedness Made Easy by Pam Crockett.
So here are my goals for this month:
Oat groats or oatmeal
granola
6 or 9 grain mix
pearl barley
apple slices in #10 can
banana slices in #10 can
ketchup
mustard
mayo
other condiments that we use
canning jars
canning lids
paper plates
cups
utensils
hand crank radio
backpacks for making a 72 hour kit
sewing kit
plastic gloves
thermometer
Tang
kool-aid
vegetable juice
peanut butter
butter
jams and jellies
solid vegetable shortening
oils (vegetable, olive, corn, etc)
soap
deodorant
shampoo
toothpaste
toothbrushes

I plan on watching for sales on the above listed items if I don't have at least a 6 month supply. I do already have quite a few of the above listed items stocked up. Anything that I don't find on sale for decent or amazing prices will transfer to next month along with the new month's goals.

Stumble Upon Toolbar