Thursday, April 30, 2009

Wow an Award!

Heidi from Tried and True cooking with Helen gave me this award. I love Heidi's blog so if you have not checked it out take a look at it.
Thank you Heidi for giving me this passionate blogger award!
The Rules:
1. Put the logo in your blog
2. Write five things you are passionate about apart from blogging
3. Tag 5 people on your lists and let them know you tagged them.

5 things I am passionate about:
1. Family. I love my three boys and my husband. I can't imagine my life without them.
2. Reading. I love to read way. I am known to stay up all night reading a new and exciting book.
3. Buying Local. I fully support our local businesses, farmers, and such. I am always looking for new ways to buy local.
4. Cooking. I love to cook and now that my kids are old enough to help it's even more fun. Yes I don't always have the perfect looking foods but we had fun making them.
5. Being Green. I try hard to be "green." We have a long way to go to become the model "green" family but we are trying are hardest.

I am tagging:
Glenda at Little Red Hen Food
Trish at My Daily SAHM Life
Sherri at KaysvilleMomma
Staci at Designing & Motherhood
Gianina at In Restaurantul Gianinei

Cheesy Garlic Bread


I love garlic bread but I do not like garlic bread from the grocery store. The flavors are off and its usually pretty soggy. I've tried to make my own garlic bread but usually the garlic flavor is overwhelming. Saturday while watching America's Test Kitchen they baked this bread. Of course I had to give it a try as soon as I could and I did. This bread was everything I hoped for in garlic bread. I even tried it a few days later without the cheese and it still tasted great. This is not a quick way to make garlic bread as it does take about 45 minutes from start to finish but it is well worth the wait.

5 garlic cloves, grated
8 tablespoons unsalted butter, softened
1/2 teaspoon water
1/4 teaspoon salt
1/4 teaspoon pepper
1 French baguette, cut in half horizontally
1 1/2 cups Italian cheese

Adjust oven rack to lower-middle position and heat oven to 400 degrees. Cook garlic, 1 tablespoon butter, and water in small nonstick skillet over low heat, stirring occasionally, until straw colored, 7 to 10 minutes.

Mix hot garlic, remaining butter, salt, and pepper in bowl and spread on cut sides of bread. Sandwich bread back together and wrap loaf in foil. Place on baking sheet and bake for 15 minutes.

Carefully unwrap bread and place halves, buttered sides up, on baking sheet. Bake until just beginning to color, about 10 minutes. Remove from oven and set oven to broil.

Sprinkle bread with cheese. Broil until cheese has melted and bread is crisp, 1 to 2 minutes. Transfer bread to cutting board with cheese side facing down. Cut into pieces.

The serrated edges on a bread knife can pull off the cheesy crust. To prevent this, place the finished garlic bread cheese side down on a cutting board. Slicing through the crust (rather than the cheese) first will keep the cheese in place.

Wednesday, April 29, 2009

Li'l Cheddar Meat Loaves


I found this recipe on a blog I recently discovered and love. Heidi from Tried and True cooking with Heidi posted the recipe for this and I just could not wait to give them a try. I am so picky when it comes to meatloaf so I was afraid I might not like these. My husband, on the other hand, loves meatloaf and was so happy I was willing to make a batch. I've been using the same recipe for meatloaf for about 6 years now so this was a change for me and one that I actually liked. I made this recipe try to the original recipe and I was very surprised at how close it tasted to my favorite one. The only thing I would do different next time, and believe me there will be a next time, is add some Worcestershire sauce to the meatloaf. Here is Heidi's post with the original recipe. This is a very quick to make meatloaf, both in assembling and baking with an added bonus of my kids devouring the meatloaf.

1 egg
3/4 cup milk
1 cup shredded cheddar cheese
1/2 cup quick-cooking oats
1/2 cup chopped onion
1/2 tsp salt
1 pound ground beef
2/3 cup ketchup
1/2 cup Brown Sugar
1-1/2 tsp prepared mustard

In a large bowl, whisk egg and milk. Stir in the cheese, oats, onion and salt. Crumble beef over mixture and mix well. Shape into eight loaves; place in a greased 13-in. x 9-in. baking dish. In a small bowl, combine the ketchup, brown sugar and mustard; spoon over loaves. Bake, uncovered, at 350° for 25-30 minutes.

Tuesday, April 28, 2009

Baked Manicotti

I tape the show America's Test Kitchen on Saturday mornings. They are the same people who publish my two favorite magazines, Cook's Illustrated and Cook's Country. I've never had a recipe we did not like from either the show or magazines. This past Saturday's show was Italian American classics and both recipes featured were on my I have to make this now list. I had a problem with the dish, I cut the recipe in half because I knew we'd never be able to eat the whole dish in 2-3 days. Somehow when I cut the recipe in half I must of miscalculated because my dish was not saucy like the one on the show. However that did not take away from the great taste of the dish. This had to be the easiest manicotti I've ever attempted to make. The idea of using lasagna noodles to make filling the pasta was brilliant I think. Here is a link to the recipe on their website.

Tomato sauce
2 28 ounce cans of diced tomatoes (in juice)
2 tablespoons extra virgin olive oil
3 medium cloves garlic, minced or garlic pressed
1/2 teaspoon red pepper flakes, optional
table salt
2 tablespoons chopped fresh basil

Cheese filling and pasta
3 cups part skim ricotta cheese
4 ounces grated Parmesan cheese (about 2 cups)
8 ounces shredded Mozzarella cheese (about 2 cups)
2 large eggs, slightly beaten
3/4 teaspoon salt
1/2 teaspoon pepper
2 tablespoons chopped fresh parsley
2 tablespoons chopped fresh basil
16 no boil lasagna noodles or you can use fresh noodles

1. For the Sauce: Adjust oven rack to middle position and heat oven to 375 degrees. Pulse 1 can tomatoes with their juice in food processor until coarsely chopped, 3 or 4 pulses. Transfer to bowl. Repeat with remaining can tomatoes.

2. Heat oil, garlic, and pepper flakes (if using) in large saucepan over medium heat until fragrant but not brown, 1 to 2 minutes. Stir in tomatoes and 1/2 teaspoon salt and simmer until thickened slightly, about 15 minutes. Stir in basil; adjust seasoning with salt.

3. For the cheese filling: Combine ricotta, 1 cup Parmesan, mozzarella, eggs, salt, pepper, and herbs in medium bowl; set aside.

4. To assemble: Pour 1 inch boiling water into 13 by 9-inch broilersafe baking dish, then add noodles one at a time. Let noodles soak until pliable, about 5 minutes, separating noodles with tip of sharp knife to prevent sticking. Remove noodles from water and place in single layer on clean kitchen towels; discard water in baking dish and dry baking dish.

5. Spread bottom of baking dish evenly with 1 1/2 cups sauce. Using soupspoon, spread 1/4 cup cheese mixture evenly onto bottom three-quarters of each noodle (with short side facing you), leaving top quarter of noodle exposed. Roll into tube shape and arrange in baking dish seam side down. Top evenly with remaining sauce, making certain that pasta is completely covered.

6. Cover manicotti with aluminum foil. Bake until bubbling, about 40 minutes, then remove foil. Remove baking dish, adjust oven rack to uppermost position (about 6 inches from heating element), and heat broiler. Sprinkle manicotti evenly with remaining 1 cup Parmesan. Broil until cheese is spotty brown, 4 to 6 minutes. Cool 15 minutes, then serve.


The manicotti can be prepared through step 5, covered with a sheet of parchment paper, wrapped in aluminum foil, and refrigerated for up to 3 days or frozen for up to 1 month. (If frozen, thaw the manicotti in the refrigerator for 1 to 2 days.) To bake, remove the parchment, replace the aluminum foil, and increase baking time to 1 to 1 1/4 hours.


Monday, April 27, 2009

Strawberry Scones


These scones were quick and easy to make. As an added bonus they were very tasty. My husband ate about 4 of them on his own. I did have a few problems while making the scones. The amount of liquid seemed off as I could not pull the mixture together. I ended up adding more cream one tablespoon at a time until the dough came together. The nutmeg and lemon zest added an interesting touch that really worked well for these scones. I found the recipe at the Family Fun magazine website.


1 cup hulled and finely diced fresh strawberries
2 cups flour
1/3 cup sugar, plus a little for sprinkling
1 tablespoon baking powder
1/2 teaspoon salt
1/4 teaspoon ground nutmeg
A lemon, for zest
6 tablespoons cold, unsalted butter, cut into 1/4-inch pieces
1/2 cup plus 1 tablespoon light cream
1 teaspoon vanilla extract

1. Heat your oven to 425°F. Line a large baking sheet with parchment paper, using a few spots of butter or cooking oil to stick it in place. Set the baking sheet aside.

2. Place the diced strawberries on several sheets of paper towel to absorb their juice. Meanwhile, combine the flour, sugar, baking powder, salt, and nutmeg in a large bowl. Zest half of the lemon into the ingredients, taking care to remove just the outermost skin and not the white pith.

3. Cut in the butter with two butter knives or a pastry blender until the flour-coated pieces are the size of peas. Add the strawberries, tossing them gently with a fork to coat them.

4. Make a well in the mixture. Blend the 1/2 cup of light cream and the vanilla extract in a measuring cup and pour them into the well. Using as few strokes as possible, gently stir the dough until it forms a ball. Let the dough sit for 1 minute.

5. Clean and flour your hands and dust your work surface with flour. Place the dough on the floured surface and knead it gently three or four times. Transfer it to the large baking sheet and pat it into an 8-inch circle. Using a lightly oiled pizza cutter or a serrated knife, cut the dough into 8 wedges, as you would a pizza. Use a small spatula or pie server to carefully separate the pieces, leaving at least an inch between them.

6. Brush the tops of the scones with the remaining tablespoon of light cream, then sprinkle the surfaces with sugar. Bake the scones until the outsides are crusty and starting to brown, about 18 minutes. Let them cool on the baking sheet for 2 minutes, then slide the parchment and the scones onto a wire rack to cool for another 20 minutes before serving.

Sunday, April 26, 2009

Homemade Pizza Hut Pan Pizza


This came very very close to an actual Pizza Hut pan pizza. However I did not get that really crunchy bite from the crust like you do from Pizza Hut. Next time, and there will be a next time, I think I'd do a few things differently. I think I'd preheat a pizza stone and bake the pans on top of the pizza stone. I also think I'd rub a garlic clove on the bottom of the pan before adding the oil. And I maybe would coat the outside crust with some garlic butter or garlic oil. I really like the taste of the dough for a pizza. I just felt it was missing some touches that would make it a real Pizza Hut pizza. The kids loved the pizza! They loved the fact that I made each kid their own pizza catered to their tastes. I found the recipe at Day to Day with Holly J.

Dough:
1 1/3 C Warm water (105F)
1/4 C Non−fat dry milk
1/2 tsp Salt
4 C Flour
1 Tbsp Sugar
1 pk Dry yeast
2 Tbsp Vegetable oil (for dough)
9 Oz Vegetable oil (3 oz. per pan)
Butter flavored Pam

Put yeast, sugar, salt, and dry milk in a large (2 qt.) bowl. Add water and stir to mix well. Allow to sit for two minutes. Add oil and stir again. Add flour and stir until dough forms and flour is absorbed. Turn out on to a flat surface and knead for about 10 minutes. Divide dough into three balls. In three 9" cake pans, put 3 Oz. of
oil in each making sure it is spread evenly. Using a rolling pin, roll out each dough ball to about a 9" circle. Place in cake pans. Spray the outer edge of dough with Pam. Cover with a plate. Place in warm area and allow to rise for 1 to 1 1/2 hours.

Sauce:
1 8 Oz Can Tomato Sauce
1 tsp Dry Oregano
1/2 tsp Marjoram
1/2 tsp Dry Basil
1/2 tsp Garlic salt
Combine and let sit for 1 hour.

For Each Nine Inch Pizza:
Preheat oven to 475F. Spoon 1/3 cup sauce on dough and spread to within 1" of edge. Distribute 1 1/2 Oz. shredded mozzarella cheese on sauce. Place toppings of your choice in this order: Pepperoni or Ham, Vegetables, Meats (cooked ground sausage or beef). Top with 3 Oz. mozzarella cheese. Cook until cheese is bubbling and outer crust is brown about 15 minutes.

Saturday, April 25, 2009

Crossroads Coop April Pickup


Here is what I picked up today:
4 lb roasting chicken
4 4oz lean Salisbury steaks
1 lb lean pork cubes
1 lb ground beef
10 lbs red potatoes
13 oranges
2 heads of broccoli
7 cucumbers
2 red leaf lettuce
17 bananas
1 head cauliflower
10 tomatoes
3 lbs strawberries
2 artisan wheat bread from Stone Ground Bakery
16 oz white rice
16 oz brown rice
10 Chapparo's beef tamales
2 sourdough bread from Stone Ground Bakery

And for all of the above I paid: $51.

Check out the coop info here.

Here are a few links for recipes using items from today's pickup:
Cool Cucumber Pasta
Cucumber Tomato salad
perfect potato salad
Greek Potatoes
Tin Foil Dinners
Sloppy Joes
Bacon Cheeseburger Salad
Delightful Banana Cake

Friday, April 24, 2009

Strawberry Poke Cake


I'm still working my way through about 10 flats of strawberries and have become quite bored with making jam and syrup so I used some to make yet another cake. My kids think they have hit the jack pot this week since I don't serve dessert all that often. This cake reminded me of cakes from church gatherings in my youth but without the sogginess I remember. It was a little complicated to make and it required several steps. Everyone loved the cake though and its one I'll make again. The recipe is from The Cooks Country Cookbook. The recipe called for frozen strawberries but I used fresh.

For the Cake:
12 tablespoons (1 1/2 sticks) unsalted butter, softened, plus extra for preparing pan
2 1/4 cups all-purpose flour, plus extra for preparing pan
4 teaspoons baking powder
1 teaspoon salt
1 cup whole milk
2 teaspoons vanilla extract
6 large egg whites
1 3/4 cups sugar

For the Syrup and Topping:
4 cups frozen strawberries
6 tablespoons sugar
2 tablespoons orange juice
1/2 cup water
2 tablespoons strawberry-flavored gelatin
2 cups heavy cream

For the cake: Adjust oven rack to middle position and heat oven to 350 F. Grease and flour a 9 x 13 baking pan. Whisk flour, baking powder, and salt in bowl. Whisk milk, vanilla, and egg whites in large measuring cup.

With electric mixer on medium-high speed, beat butter and sugar until fluffy, about 3 minutes, scraping down bowl as necessary. Add flour mixture and milk mixture alternately, in two batches, beating after each addition until combined, about 30 seconds each time. Using rubber spatula, give batter final stir. Scrape into prepared pan.

Bake until toothpick inserted in center comes out clean, about 35 minutes. Cool cake completely in pan, at least 1 hour. Once cool, cake can be wrapped in plastic and kept at room temperature for up to 2 days.

For the syrup and topping: Heat 3 cups strawberries, 2 tablespoons sugar, juice, and water in medium saucepan over medium-low heat. Cover and cook until liquid is deep red and strawberries are softened, about 10 minutes. Strain liquid into bowl, reserving solids, then whisk gelatin into liquid. Let cool to room temperature, at least 30 minutes.

Meanwhile, poke about 50 holes in top of cooled cake. Don't poke to the bottom of the pan though or the jello mixture will sink and pool around the bottom. Slowly pour cooled liquid evenly over top of cake. Wrap with plastic wrap and refrigerate until gelatin is set, at least 3 hours or up to 2 days.

Pulse reserved strained strawberries, 2 tablespoons sugar, and remaining strawberries in food processor until mixture resembles strawberry jam. Spread strawberry mixture evenly over cake. With electric mixer on medium-high speed, beat cream with remaining sugar to soft peaks. Spread cream over strawberries.

Perfect Potato Salad


I love potato salad and will usually try any new recipe I find for potato salad. Sadly my husband does not share my love for potato salad. He'll suffer through a small amount just for appearance sake but he really does not like potato salad. Melanie from My Kitchen Cafe posted this recipe and it looked tasty to me. So I decided to serve it with the ribs I made. The recipe calls for hard boiled eggs, which I can stomach at times in my salad, but I left them out this time. I must say I really liked the dressing part of the salad. I'll be using it again in the future. The olives added an interesting taste to the salad but I am not sure I loved them. I missed my onions and the crunch from celery. However the things I missed is what I think made my husband love the dish. Overall this was a perfect potato salad for my family and one I look forward to making again soon. I used fresh buttermilk instead of powdered and water.


Melanie's recipe
Dressing:
2 cups mayonnaise
4 tablespoons powdered buttermilk (The recipe calls for powdered buttermilk but if you have fresh buttermilk, eliminate the 4 tablespoons powdered buttermilk and 2/3 cup water from the recipe and substitute 2/3 cup fresh buttermilk.)
2/3 cup water
1 1/2 teaspoon dried parsley
1 teaspoon salt
1 1/2 teaspoons minced dried onions
1 1/2 teaspoons garlic salt
1 teaspoon seasoned salt
1 teaspoon ground black pepper
2 tablespoons mustard

The easiest way to make this is to add all the ingredients to the mayo jar and shake like your life depends on it until everything is combined. Of course, this requires that the mayo jar is half empty (with only 2 cups of mayo in it). If this is not the case, simply combine all the ingredients in a blender and give it a whirl until all ingredients are combined.

Salad:
5 pounds potatoes
1 cup sliced olives
10 hard-boiled eggs, diced

Peel, dice, and boil potatoes until tender but not mushy (I cut my potatoes into bite-size pieces and boil for about 10-11 minutes). Drain potatoes well and pour into large bowl. Add sliced olives and hard-boiled eggs. Pour dressing over warm potatoes until desired "dressing-level" is reached.

*For perfect hard-boiled eggs, place eggs in a deep saucepan; cover with cold water by 1 inch. Bring to a boil over high heat. Remove from heat, cover, and let stand 14 minutes. Transfer to an iced water bath; let cool completely. Unpeeled eggs can be refrigerated for up to 1 week.

Thursday, April 23, 2009

Chicago-Style Barbecued Ribs

Again another nice day so we used the grill again. This time I used the ribs my father gave me a few weeks ago that I threw in the freezer. The recipe called for baby back ribs but I did not have the baby back ones. The smell from these ribs cooking was amazing. The whole neighborhood seemed to stop by the house to ask what I was cooking. Near the end of the cooking time I noticed that one of the kids was opening the cover to sneak little pieces of meat off the ribs because as he put it, "it smelled so yummy!" Yes they did take a little bit of work to make but it was well worth it. Also the bbq sauce had great flavor. I put the leftovers in the fridge to use in the future. The recipe came from the Cook Country Cookbook. I served a potato salad, recipe coming tomorrow, and a coleslaw with the ribs.


Ribs
1 tablespoon dry mustard
1 tablespoon paprika
1 tablespoon dark brown sugar
1 1/2 teaspoons garlic powder
1 1/2 teaspoons onion powder
1 1/2 teaspoons celery salt
1 teaspoon cayenne pepper
1/2 teaspoon ground allspice
2 racks baby back ribs (about 1 1/2 pounds each), membrane removed
1 cup hickory wood chips , soaked for 15 minutes


Sauce
1 1/4 cups ketchup
1/4 cup molasses
1/4 cup cider vinegar
1/4 cup water
1/8 teaspoon liquid smoke

1. For the ribs: Combine mustard, paprika, sugar, garlic and onion powders, celery salt, cayenne, and allspice. Reserve 2 tablespoons for sauce. Pat ribs dry with paper towels and massage remaining spice rub into both sides of ribs. (Ribs can be wrapped in plastic and refrigerated for up to 24 hours.)

2. Open bottom vent on grill. Light 100 coals. Arrange 13 by 9-inch disposable aluminum pan filled with 2 cups water on one side of grill. When coals are covered in fine gray ash, arrange in pile on opposite side. Scatter chips over coals and set cooking grate in place. (For gas grill, place chips in small disposable aluminum pan and place directly on primary burner of grill. Place another disposable aluminum pan filled with 2 cups water on secondary burner(s) and set cooking grate in place. Turn all burners to high and heat, covered, until chips are smoking heavily, about 15 minutes. Turn primary burner to medium and shut other burner(s) off.) Position ribs over water-filled pan and cook, covered (open charcoal grill lid vent halfway), rotating and flipping racks once, until ribs are deep red and smoky, about 1 1/2 hours.

3. Adjust oven rack to middle position and heat oven to 250 degrees. Set wire rack inside rimmed baking sheet and add just enough water to cover pan bottom. Arrange ribs on wire rack, cover tightly with aluminum foil, and cook until ribs are completely tender, 1 1/2 to 2 hours. Transfer to serving platter, tent with foil, and let rest 10 minutes.

4. For the sauce: Meanwhile, whisk ketchup, molasses, vinegar, water, liquid smoke, and reserved spice rub in bowl. Brush ribs with 1 cup barbecue sauce. Serve, passing remaining sauce at table.

Wednesday, April 22, 2009

Big Boy Cheeseburgers with Homemade Hamburger Buns


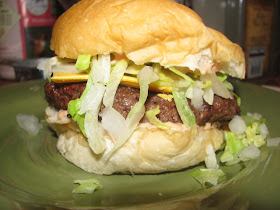
The weather has been really nice the last few days so I've been working on using the grill outside. Yesterday I made these cheeseburgers and they so good. One of the boys actually ate all of his cheeseburger which is a rare feat. I've never eaten at a Big Boy but my husband talks all the time about the great burgers they have there. As usual he can't fully remember much about an item when I ask what flavors and taste did it have. I'm constantly playing with recipes to get it to taste like he remembers. This has been a burger I've played with for years now and yesterday he claims I finally got the "recipe" right. I also made homemade hamburger buns since my favorite brand now has high fructose corn syrup in them.

Hamburger Buns from allrecipes.com
I did not make 25 rolls with this recipe. I made about 10 rolls because I wanted a larger roll than it sounded like I would get from making 25 rolls.
  • 2 cups warm milk (110 degrees F/45 degrees C)
  • 1/4 cup margarine, melted
  • 1/4 cup warm water
  • 1/4 cup white sugar
  • 2 (.25 ounce) packages instant yeast
  • 2 teaspoons salt
  • 6 cups all-purpose flour, or as needed

  1. In a large bowl, stir together the milk, margarine, warm water, sugar and yeast. Let stand for about 5 minutes.
  2. Mix in the salt, and gradually stir in the flour until you have a soft dough. Divide into 25 pieces, and form into balls. Place on baking sheets so they are 2 to 3 inches apart. Let rise for 20 minutes.
  3. Preheat the oven to 375 degrees F (190 degrees C). Bake the rolls for 15 minutes in the preheated oven. Cool slightly, then split them in half horizontally to fill with your favorite burgers.

Big Boy Cheeseburgers
ground beef patties
Grill Mates hamburger seasoning
1/2 cup may
1/4 cup ketchup
3 tablespoons dill relish
lettuce
American cheese


ground beef patties
Grill Mates Hamburger seasoning
Sprinkle the seasoning liberally on the patties. Grill the burgers until cooked.

For the special sauce
Mix 1/2 cup mayo with 1/4 cup ketchup. Add about 3 tablespoons of dill relish. Stir until blended

To assemble the burger:
Add special sauce to top and bottom of the inside of the hamburger bun.
Place hamburger on bottom bun and top with a slice of American cheese.
Top with lettuce and top bun.

Tuesday, April 21, 2009

Manti Chicken


I have never tried this marinade before but I'll admit I was pleasantly surprised at how good it tasted. The flavor was really good. The kids ate all of their chicken and came back several times asking for more. The chicken was tender with loads of flavor. I used bone-in chicken breasts along with some leg quarters and drumsticks. I left the skin on which I would probably remove next time. The oil from the marinade caused a few flare ups which left the skin torched. I removed the skin before serving but I think we lost more flavor by doing this. I've heard that you can use this marinade for steaks and turkey too. I found the recipe in the WorldWide Ward Cookbook. This dish is served at the Manti Mormon Pageant.

1 cup soy sauce
1 cup oil
1 tsp. horseradish
1 tsp. garlic salt
24oz lemon-lime soda (7up or Sprite)
boneless, skinless chicken (like I said I used bone-in with skin because it was all I had)

Mix marinade ingredients together; add chicken pieces and marinate for at least 7 hours. Cook chicken over grill.

Monday, April 20, 2009

Ham and Cheese Roll Ups


This was a huge hit in our house. These roll ups were quick and easy to put together and they were adaptable to every taste in the house. My boys love the fact they get to dip their sandwich into something. I made about 5 different versions of this dish since everyone had different tastes. I used spinach on some and arugula on a few. I left the red peppers out of some and like the one pictured just had meat and cheese in one.
I found the recipe in the March/April 2009 issue of Simple and Delicious magazine.

2 Tbsp. olive oil, divided
4 flour tortillas (10 inch)
1/2 cup grated Parmesan cheese, divided
1/4 lb thinly sliced deli ham
1/4 lb thinly sliced provolone cheese
1/4 lb thinly sliced hard salami
1/2 cup roasted sweet red peppers, drained and julienned
1 cup (4 oz) shredded part skim mozzarella cheese
marinara sauce, optional

Brush 1 Tbsp oil on one side of tortillas. Sprinkle with 1/4 cup Parmesan cheese. Layer tortillas with ham, provolone cheese, salami, red peppers and mozzarella cheese. Fold in sides of tortillas; roll up.
Place seam side down on a parchment lined baking sheet. Brush with remaining oil; sprinkle with remaining Parmesan cheese. Bake at 425 degrees for 9-12 minutes or until golden brown. Serve with marinara sauce if desired.

Sunday, April 19, 2009

Blender Salsa


This was quick and easy to make and easily customized to your tastes. I was hoping to have a salsa similar to Javier's, local Mexican joint, but while this comes very close its not quite it. I found the recipe on Laura's blog. It was a little spicier than I prefer but I think that was because I added fresh jalapeno since I did not have canned tomatoes with jalapenos. You know it must be goo when all three kids keep going back for more.

1 clove garlic, chopped
1/4 white onion, chopped
1 (14 ounce) can diced tomatoes with jalapenos, undrained
1/2 cup cilantro leaves, with some tender stems
juice of 1 lime (or lemon will work too)
salt, to taste

Combine ingredients in the blender in the order listed. Puree until smooth, or leave a little chunky, if desired.

Saturday, April 18, 2009

Flautas


These were very good and I loved the fact they were baked instead of fried. I was even able to get two of three kids to give these a try. Dh voted these as a keeper and something he wants often This was another great recipe I found on Gianina's blog. I did make a few changes though. I used a pork sirloin roast instead of chicken. I sprinkled taco seasoning on top of the roast before cooking it in the slow cooker. After it was cooked I shredded it and added the rest of the taco seasoning along with a little water to allow the taco seasoning mix to blend. I also added guacamole to the flautas before baking.

Here is the original recipe before my changes I listed above:
3 chicken breasts
1 Tbsp. Fajitas Seasoning
1 tsp. garlic salt
1 small can chopped green chiles
10 flour tortillas
1 cup shredded cheese (whatever you like, I used cheddar)
toppings of your choice to dip them in such as salsa, guacamole, etc.

Place your chicken in a crock pot with the fajita seasoning and garlic salt and cook on low for at least 6 hours. About 1 hour before you want to eat, remove chicken from the crock pot. Shred the chicken and allow to cool for about 30 minutes. Then mix in shredded cheese.

Preheat the oven to 425 degrees. Put flour tortillas for 1-2 minutes in the microwave to soften. Place a bit shredded chicken on the side of the tortilla then roll. Place, seam side down, on a baking sheet that's been coated with cooking spray. Finish rolling the rest of the flautas, then spray each of them with cooking spray and bake for 5-6 minutes then turn over and cook for an additional 5-6 minutes or until crispy and golden brown.

Sour Cream Rice

I discovered this great recipe on a blog that I discovered the other day. Gianina posted this recipe and it just called out to me. The flavors were great and it was quite easy to put together. Here is the link to Gianina's post about this dish.

2 cups rice, cooked
1 tsp salt
1/2 T. garlic powder
2 cups sour cream
1 cup grated monterey jack cheese or any soft white cheese
3 cups grated cheddar cheese
1 (4 ounce) can chopped green chilies, no seeds or 1/2 cup chopped fresh chili pepper, no seeds

While cooking rice, season with salt and garlic powder. Mix cooked rice, sour cream and green chiles. Mix grated cheeses together and reserve 1 cup for topping. Stir in cheeses with rice/sour cream mixture. Pour rice mixture into a lightly greased casserole dish. Top with reserved 1 cup grated cheese. Bake at 350 degrees F. for 30 minutes.

Bountiful Baskets Coop

The other day I heard about this coop. I decided on a whim to give it a try and I have to admit I am impressed. I paid $15 plus a one time first time $3 fee for the following:
1 lb strawberries
1 broccoli, probably 2 lbs
1 pineapple
1 1/2 lbs grapes
3 large cucumbers
8 apples
2 squash
8 red potatoes
10 tomatoes
9 bananas
5 mangoes
not pictured was a head of greens

The pick up is every other week. I believe they start taking orders again on April 28th through the 29th. Here is the link to the food coop.

Friday, April 17, 2009

Hawaiian Ham and Cheese Sandwiches


Simple and easy dish to make. However I think these are better as an appetizer than a main dish, which is how I served them. The kids actually ate them which is a bonus. I must warn that if you eat one that has not firmed up it tastes very soggy with a weird after taste. Somehow I managed to get about 2 of the soggy ones and it really turned me off of the sandwiches. But everyone else in the house loved them. It's an interesting taste combination that works. I found the recipe in the World Wide Ward Cookbook.

2 dozen King Sweet Hawaiian Rolls
1 to 1 1/2 lb thin-sliced ham
12 slices Swiss cheese
1 cup butter or margarine
4 tablespoons Worcestershire sauce
1 tsp. garlic powder
2 Tbsp poppy seeds (I did not use)

Cut rolls in half. Place desired amount of ham on each roll. Cut slice of Swiss cheese in half, then fold cheese in half and place on top of ham. Fold sandwich back together. Melt butter. Stir Worcestershire sauce and garlic powder into butter. Allow to cool a bit. Pour all the mixture over the top of the sandwiches; it is okay for them to be soaking in the butter! Sprinkle poppy seeds over the top. Place foil lightly over the top and refrigerate overnight or 6-8 hours. Bake at 350 degrees for 15-20 minutes.

Thursday, April 16, 2009

Strawberry Cake

Seriously this was the best tasting cake I've ever tasted. The picture does no justice to the taste of the cake. It was so good I am still thinking about this cake. Sadly though the cake looked awful as I had all kinds of problems with the layers and sticking to the baking pans due to the kids helping me. This cake really was not hard to make and I promise you it tastes better than any boxed cake mix you've ever tried. I used three different recipes in making this cake. Also instead of using frozen strawberries I used fresh in the cake.

Strawberry Cake from Scratch
from allrecipes.com
  • 2 cups white sugar
  • 1 (3 ounce) package strawberry flavored gelatin
  • 1 cup butter, softened
  • 4 eggs (room temperature)
  • 2 3/4 cups sifted cake flour
  • 2 1/2 teaspoons baking powder
  • 1 cup whole milk, room temperature
  • 1 tablespoon vanilla extract
  • 1/2 cup strawberry puree made from frozen sweetened strawberries

  1. Preheat the oven to 350 degrees F (175 degrees C). Grease and flour two 9 inch round cake pans.
  2. In a large bowl, cream together the butter, sugar and dry strawberry gelatin until light and fluffy. Beat in eggs one at a time, mixing well after each. Combine the flour and baking powder; stir into the batter alternately with the milk. Blend in vanilla and strawberry puree. Divide the batter evenly between the prepared pans.
  3. Bake for 25 to 30 minutes in the preheated oven, or until a small knife inserted into the center of the cake comes out clean. Allow cakes to cool in their pans over a wire rack for at least 10 minutes, before tapping out to cool completely

Whipped Cream Cheese Frosting
from allrecipes.com
  • 1 (8 ounce) package cream cheese
  • 1 cup white sugar
  • 1/8 teaspoon salt
  • 1 teaspoon vanilla extract
  • 1 1/2 cups heavy whipping cream
  1. In a small bowl beat whipping cream until stiff peaks form; set aside.
  2. In a large bowl combine cream cheese, sugar, salt and vanilla. Beat until smooth, then fold in whipped cream.
Strawberry Filling for between the layers
from recipezaar
  • 2 1/2 cups coarsely chopped hulled strawberries
  • 1/2 cup sugar
  • 2 1/2 tablespoons cornstarch
  1. Bring all ingredients to a boil in a heavy small sauce pan, stirring constantly and crushing berries slightly with back of spoon.
  2. Boil 2 minutes to thicken, stirring constantly (mixture will be slightly chunky)
  3. Pour into bowl and cool completely.

Deviled Eggs


We have hard boiled eggs from Easter and this year I am determined not to throw them out. So since Don is the only person in the house who will eat eggs I asked what he wanted me to make with the eggs. He asked for deviled eggs and egg salad so today I am featuring the deviled eggs. The recipe comes from Cook's Country April/May 2009 issue. He really liked the eggs and has requested a few more be made.

6 large eggs, hardboiled
2 tablespoons mayo
1 tablespoon sour cream
1/2 teaspoon white vinegar
1/2 teaspoon spicy brown mustard
1/4 teaspoon sugar
1/8 teaspoon salt
1/8 teaspoon pepper

Peel eggs and halve lengthwise. Transfer yolks to fine mesh sieve set over a medium bowl. Using spatula, press yolks through the sieve into bowl. Stir in remaining ingredients until smooth.

Arrange whites on serving platter. Divide yolk mixture among whites. Egg white halves and filling mixture can be refrigerated separately for 2 days. I sprinkled the tops with paprika.

Wednesday, April 15, 2009

AuGratin Potatoes

I loved these potatoes. I can not wait to make them again. While the actual cooking time took awhile the set up was quick and easy. I made these to go with our ham on Easter and they were a hit. I made two batches of these potatoes and only a small amount was left. They were not greasy and they tasted so much better than the boxed potatoes. I found the recipe in Cook's Country Magazine, April/May 2009 issue.

1 1/4 cups shredded sharp cheddar cheese
1 1/4 cups shredded Monterey Jack cheese
1/2 cup grated Parmesan cheese
2 teaspoons cornstarch
3 pounds russet potatoes, peeled and sliced 1/8 inch thick
salt and pepper
3/4 cup heavy cream
1/2 cup low sodium chicken broth

Adjust oven rack to middle position and heat oven to 350 degrees. Toss cheeses and cornstarch in large bowl until evenly coated.

Shingle half of potatoes in large gratin dish, sprinkle evenly with one cup cheese mixture, 3/4 teaspoon salt, and 1/4 teaspoon pepper. Top with remaining potatoes, additional 3/4 teaspoon salt, and additional 1.4 teaspoon pepper.

Combine cream and broth in large measuring cup and pour over potatoes. Top with remaining cheese mixture and bake until golden brown and fork inserted into center meets little resistance, 75 to 90 minutes. Let cool 10 minutes. Serve.

Tuesday, April 14, 2009

Fettuccini Alfredo


I love this dish. Its not very healthy but sometimes you need a break from eating healthy all the time. Sometimes if I feel like making it a little healthier I'll use fat free evaporated milk in place of the heavy cream or fat free half and half. I've been playing with subbing fat free or reduced fat evaporated milk in place of heavy cream with pretty good results. Anyway this recipe comes from a new cookbook titled The World Wide Ward Cookbook. It's a little different then most recipes I've tried but it tasted really good.

1 16oz. pkg. fettuccini
1/2 cup butter
1/4 cup flour
1 quart half and half or heavy cream
3/4 cup parmesan cheese
1/2 cup romano cheese or 8 oz cream cheese
1 tbsp. parsley (flakes or fresh)
1 1/2 tsp. garlic powder
salt pepper

Cook fettuccine according to package directions; drain and set aside. Melt butter in a heavy saucepan. Add flour; cook and stir until smooth and bubbly. Slowly stir in cream. Add cheeses, parsley, garlic powder, salt and pepper. Simmer until sauce thickens, taste; add more salt and pepper if needed. Serves 6-8.

Sunday, April 12, 2009

Chocolate Chip Cookie Pie

See! My next addition to my sisters food blog is a dessert and not a pasta. Which, to be honest, are probably the only two food groups i recgonize willingly. I found this wonderfully delicious, sugary, chocolately concoction at the Bakerella website. I plan on making the 14 layer cake for my birthday. It needs to come faster!


Chocolate Chip Cookie Pie

1 unbaked 9-inch (4-cup volume) deep-dish pie shell
2 large eggs
1/2 cup all-purpose flour
1/2 cup granulated sugar
1/2 cup packed brown sugar
3/4 cup (1 1/2 sticks) butter, softened
1 cup (6 ounces) semi-sweet chocolate morsels
1 cup chopped pecans

Preheat oven 325 degrees.
Beat eggs in large mixer bowl on high until foamy. Beat in flour, granulated sugar and brown sugar. Beat in butter. Stir in morsels and nuts and spoon into pie shell.

Bake for 55-60 minutes. Cool on wire rack. Serve warm.

I found that here in Utah the pie browned quite quickly and I covered mine with foil about 35 minutes into cooking.

Of course this dessert was our Easter dessert, so it needed a bunny on it. And you can tell by the first picture that I served mine with some icecream. And yes that is indeed homemade icecream. Cinnamon Almond icecream to be exact. I found a vanilla recipe that I adapted.


Cinnamon Almond Icecream


2 large eggs
3/4 cup of granulated sugar
2 cups whipping cream
1 cup whole milk
1/2 teaspoon ground cinnamon
1/2 teaspoon almond extract
1 1/2 teaspoons vanilla extract


Whisk the eggs in a mixing bowl until light and fluffy, 1 to 2 minutes. Whisk in the sugar, a little at a time, then continue whisking until completely blended, about 1 minute more. Pour in the cream and milk and whisk until blended. Transfer mixture to a pot and cook on medium low heat just until it starts to simmer. Pour into a bowl and stir in the cinnamon. Cool in refrigerator until throughly chilled. Stir in almond and vanilla extracts and transfer the mixture to an ice cream maker and freeze following the manufacturer's instructions.


I feel my ice cream maker, which is a 1 quart Rival, the motor overheats and shuts off before the icecream is thoroughly churned. So when mine shuts off, I refreeze the canister with paddle and icecream in it for about an hour and pull it back out and hook it back up. Basically giving it double churned effect. I think it makes for harder icecream(I don't like soft serve much) and it really doubles the volume of the icecream. I really love homemade icecream.

Creamy Italian Salad Dressing

Another great salad dressing from Cook's Country. This is from their April/May 2009 issue. Overall it was a great dressing however I should point out that the size of the shallot is going to make a difference. I used a medium shallot and it was over powering. I suggest using a small sized shallot.

3 tablespoons red wine vinegar
3 tablespoons grated Parmesan cheese
1 shallot, minced
1 garlic clove, minced
2 teaspoons dried oregano
1/4 teaspoon red pepper flakes
1/2 cup mayonnaise
1/4 cup sour cream
1 tablespoon chopped fresh basil
1/2 cup olive oil
salt and pepper

Whisk vinegar, Parmesan, shallot, garlic, oregano and pepper flakes in small bowl. Microwave until cheese is melted (vinegar will look cloudy) and mixture is fragrant, about 30 seconds. Let cool.

Process mayo, sour cream, basil, and vinegar mixture in food processor until smooth. With motor running, slowly add oil until incorporated, about 1 minute. Season with salt and pepper. Serve. (Dressing can be refrigerated in airtight container for 4 days.)

Saturday, April 11, 2009

Roast Beef with Gravy

Usually I check out new cookbooks from the library before buying them but with Trisha Yearwood's cookbook I bought sight unseen. I have been a fan of Trisha for years and figured I'd want the book no matter what. Her cookbook is titled Georgia Cooking in an Oklahoma Kitchen. It's full of traditional American food which is right up my style. She suggests serving this roast over rice but I used egg noodles.

1 5 pound boneless chuck roast
salt and pepper to taste
1 large red onion, sliced
1/4 cup cider vinegar
4 tablespoons all purpose flour

Preheat oven to 450 degrees.

Line a 9X13X2 inch pan or your oven's broiler pan with a sheet of heavy duty aluminum foil large enough to fully wrap the roast. The shiny side of the foil should be up. Sprinkle the roast on all sides with salt and pepper and place it in the center of the foil. Spread the onion slices over the top of the roast and pour vinegar around it. Bring the ends of the foil together and fold several times, then fold the ends together to completely enclose the roast. Pour about 1 inch water into the pan around the foil wrapped roast. Bake 3 to 4 hours, or until meat is fork-tender and brown. Check the water level in the pan regularly during cooking and replenish it if necessary. If any juice seeps from the foil seals during roasting, save it to use in making the gravy.

When the roast is done, remove the package from the baking pan and let it cool for a few minutes. Open the package carefully to preserve all the juices and transfer the meat to a platter; cover with a tent of foil to keep it warm while you make the gravy.

Pour the roasting juices into a measuring cup and let the fat rise to the surface. Skim off the fat, reserving 4 tablespoons in a saucepan and discarding the res. (If the fat measures less than 4 tablespoons, add enough butter to make up the difference.)

Measure the remaining defatted pan juices; if you have less than 2 cups, add water to make 2 cups.

Add the flour to the fat in the saucepan and stir with a wire whisk to make a roux. Cook over medium low heat until the flour is lightly browned, about 1 minute. Slowly whisk in the reserved pan juices and stir until thickened.

Slice the roast or cut it into chucks (it will be tender), and serve it with the gravy.

Thursday, April 9, 2009

Roasted Red Pepper Pasta.

It's me again, with yet another pasta recipe! I know, I keep trying the same old schtick again and again. I swear my Easter recipe is NOT a pasta recipe. I'm so grateful that my wonderful blog starter of a sister introduced me to The Pioneer Woman. She lives the life I only dream of. I would like to think I could survive on a ranch but I probably wouldn't. But how I love to dream about it. I got this pasta recipe from her.

As you saw with Norah's post, we got an abundance of red peppers from the food co-op. I do like to eat red peppers just plain but I had far too many to do that. And viola, this recipe appeared. I enjoyed it but personally I wanted a smoother sauce. I think I'd put the onion into the food processor, after cooking them, with the red peppers and pine nuts.


Pasta with Roasted Red Pepper Sauce
3 red bell peppers

2 tablespoons pine nuts (optional)
1/2 medium onion, finely diced
3 cloves garlic, minced
1/2 cup heavy cream
Flat leaf parsley, finely minced
Fresh Parmesan, shaved or grated
1/2 to 1 pound pasta: orecchiette, penne, fusilli, etc.

Roast red peppers, then place in a Ziploc bag to allow to sweat. Peel the charred skins from the peppers, then removed seeds. Set aside.

Lightly toast pine nuts in a skillet. Set aside.

Puree peppers with pine nuts. Set aside.

Cook pasta according to package directions.

In a skillet or pot over medium heat, drizzle in olive oil. Add diced onions and garlic and cook until soft. Pour in pepper puree and stir together. Add plenty of salt. Pour in cream and stir to combine. Taste and add more salt, if necessary. Add cooked pasta, then stir together.

Hoisin Honey Ribs


Another great recipe from one of my favorite food blogs, My Kitchen Cafe. I've been wanting to give this recipe a try for awhile now and kept putting it off for numerous reasons but I finally made it this week. I followed how Melanie made the dish by using country style ribs which are not my favorite cut of meat. My husband loves the country style ribs so I am constantly looking for a new way to make them so I will eat them. Overall the ribs were delicious. I actually was able to get the kids to eat all of what was placed on their plate and Don ate leftovers for two days. However, I found them to be okay and wished I had made them with the regular ribs. I loved the sauce and will make this again, even if I had to make it with country style ribs. Give the recipe a try as it really is a very tasty dish.

3 1/2 pounds pork of spareribs, halved crosswise, preferably by a butcher, and cut into individual ribs
1/3 cup honey
1/4 cup soy sauce
1 large garlic clove, minced and mashed to a paste with 1/4 teaspoon salt
1/3 cup hoisin sauce
1/2 teaspoon dry mustard
1/4 cup distilled white vinegar

In a kettle of boiling salted water simmer the ribs, covered, for 30 minutes and drain them well. (Watch closely, mine boiled over BIG time!)

In a large bowl whisk together the honey, the soy sauce, the garlic paste, the hoisin sauce, the mustard, the vinegar, and black pepper to taste, add the ribs, and toss the mixture well, coating the ribs thoroughly. Let the ribs marinate, chilled, for at least 1 hour or overnight. (I marinated mine overnight and the marinade seeped into every pore of the ribs - yum!)

Remove the ribs from the marinade, arrange them in one layer on the oiled rack of a foil-lined broiler pan, and broil them under a preheated broiler about 4 inches from the heat, basting them with the marinade, for 3 minutes. Turn the ribs with tongs and broil them, basting them with the marinade, for 2 to 3 minutes more, or until they are browned well and glazed. Discard the marinade.

Wednesday, April 8, 2009

Honey Mustard Salad Dressing


Another salad dressing. I know I post them it seems all the time but we are big salad eaters in our house. I really can not handle the taste of bottled salad dressing anymore so I have fun trying new recipes for dressing. This one was really tasty and had lots of flavor. It was easy to make, called for no exotic ingredients, and could be made minutes before the salad without needing time for flavors to blend. I think this would also make a nice dipping sauce for chicken nuggets or even a sauce for a chicken sandwich or my chicken wraps. I found the recipe at allrecipes.

1/4 cup mayonnaise
1 tablespoon prepared mustard
1 tablespoon honey
1/2 tablespoon lemon juice
In a small bowl, whisk together the mayonnaise, mustard, honey, and lemon juice. Store covered in the refrigerator.

Tuesday, April 7, 2009

Chipped Beef Gravy over Toast


I remember eating this dish growing up. I can't say it was a favorite then but I will admit I really liked it as a grown up. I was worried about making this as I really do not like those little packets of deli meat. However Don loves food like this so I was willing to give it a try. I was pleasantly surprised at how good it was. Sadly the picture does not show it off to be the great tasting dish it was. It was a really quick and easy dish to make and it was cheap. I fed three adults for a total of $3. The recipe came from the Meal Planning Mommies blog.
I made a few little changes to the recipe but did stick close to the original.

2 packages of Budding Beef
2 cups milk,
toast, I used 6 pieces for 3 adults
4 Tb. butter
1/4 cup flour
1/4 t pepper
1/4 tsp. garlic salt

Melt 4 Tb. butter over medium heat in a large skillet.
Cut the beef into bite size pieces and cook in butter until they start to brown.
Once your meat is done, add 1/4 cup flour, 1/4 t. pepper, and 1/4 tsp. garlic salt. Stir and cook until bubbly.
Add 2 cups milk, stir constantly until boiling. Cook 1 min. or until to your desired thickness.

Monday, April 6, 2009

Easy Herb Dinner Rolls


I've been wanting to give something like this a try for awhile now. A little different then the rolls I usually make and they were a huge hit. There are two ways you could do this. One by using the frozen Rhodes rolls or the second being making your own rolls. Either way its a nice change for a simple dinner roll.

batch of roll dough or the frozen Rhodes rolls
4 tablespoons melted butter, separated into 2 tablespoon portions
Johnny's garlic and cheese seasoning

I used two tablespoons melted butter on the bottom of the pan I was cooking the rolls in. I then sprinkled about 1 tablespoon of the Johnny's seasoning on top of the butter. I placed the rolls in the pan and let rise according to the directions of the recipe/package.
When they were ready to bake I spread the remaining 2 tablespoons of butter over the rolls and then sprinkled another tablespoon of Johnny's seasonings over the rolls. I baked according to package/recipe directions.

Sunday, April 5, 2009

Crispy Pan Fried Pork Chops

These are quick, easy, and very tasty pork chops. If your looking for an easy meal to make these should be near the top of your list. Every person in our house ate these up and commented on how good they tasted. I could not believe how quick they cooked and to be loaded with flavor was an added bonus. This recipe comes from the Feb/March 2009 issue of Cook's Country. They also list a few other variations on this recipe, a BBQ pan fried pork chop and Herbed pan fried pork chops.I know I do a lot of recipes from Cook's Country magazine but I have to say I've never had something I do not like from the magazine. If you have not checked out the magazine I recommend you do.

1 teaspoon garlic powder
1/2 teaspoon paprika
1/2 teaspoon salt
1/2 teaspoon pepper
1/4 teaspoon cayenne pepper
1 cup all purpose flour
4 bone in rib or center cut pork chops, about 3/4 inch thick
3 sliced bacon, chopped
1/2 cup vegetable oil

Combine garlic powder, paprika, salt, pepper, and cayenne in bowl. Place flour in shallow dish. Pat chops dry with paper towels. Cut 2 slits about 2 inches apart through fat on edges of each chop. Season both sides of chops with spice mixture, then dredge chops lightly in flour (do not discard flour). Transfer to plate and let rest 10 minutes.

Meanwhile cook bacon in large nonstick skillet over medium heat until fat renders and bacon is crisp, about 8 minutes. Using slotted spoon, transfer bacon to paper towel lined plate and reserve for another use. Do Not wipe out pan.

Add oil to fat in pan and heat over medium high heat until just smoking. Return chops to flour dish and turn to coat. Cook chops until well browned, 3 to 4 minutes per side.

Saturday, April 4, 2009

Ginger Ale Meatballs


I was a little worried that these meatballs would not taste good to me but I was rather surprised. This is a very easy to make, quick to put together, and uses only a few ingredients. I usually make my own meatballs because I do not like the taste of frozen meatballs at all. However my father bought some frozen meatballs and I've been trying hard to find recipes to use them up. Overall the flavor for the sauce was really good considering the few ingredients that were in the recipe. I did eat the meatballs although I did have a hard time getting past the texture of the frozen meatballs. I found the recipe at Real Mom's Kitchen .

39 ( 1 1/2 pounds) frozen, fully cooked meatballs (I only use 1 pound, that was enough for my family of 5)
2 cups ginger ale
2 cups ketchup
1 teaspoon minced garlic

Place frozen meatballs in a 3- to 4-quart slow cooker prepared with nonstick cooking spray. In a bowl, combine ginger ale, ketchup, and garlic. Pour mixture over meatballs. Cover and cook on low heat for 6-8 hours or on high heat for 3 hours (I did the 3 hours on high). Serve with toothpicks as an appetizer, on hoagie buns, or over hot cooked noodles.

Friday, April 3, 2009

Homemade Chips


I made these to go with the french dip sandwiches. This was the first time I gave a try to making my own chips and overall they turned out good. They took a little longer to crisp up then I first thought.

about 8 red potatoes (its what I had on hand you could probably use whatever you have on hand)

Preheat the oven to 450 degrees. While the oven is preheating start slicing the potatoes. The thickness will depend on how crispy you want the chips.
Spray Pam or grease lightly the cookie sheet. Lay the potato slices in a single layer.
The time it will take depends on the thickness of the chips. I'd start checking after 2-3 minutes. Flip the chips over when crisp on the bottom side and then check again after another 2-3 minutes. The thickness I cut the chips, which was not wafer thin but not more than 1/4 inch thick, took about 5-8 minutes per side.
After both sides are crisp remove and season to your taste. I used garlic salt. If your not serving right away place the chips in a single layer on cooling racks.

Thursday, April 2, 2009

Easy French Dip Sandwiches


Here is a favorite go to recipe for days when its crazy or I'm not feeling up to cooking. I can have it ready to eat in less than 10 minutes. While I prefer my french dip to be made from beef roast this still makes a nice french dip sandwich.

1 package of AuJus mix
1 pound shaved roast beef from the deli
hoagie rolls
cheese, optional (I did not use cheese in the picture)
butter, optional
cooked onions and mushrooms, optional

Mix the AuJus according to package directions. Add roast beef and allow to warm up. You can butter the hoagie rolls and broil them in the oven until toasty, if desire. When rolls are toasted add cheese, if using, and then add the roast beef. Add onions and mushrooms if you desired. Serve with a bowl of AuJus sauce for dipping.