Tuesday, May 24, 2011

Ms. Millie's Best Coleslaw

We love coleslaw in our house. I don't think I ever turn down a coleslaw recipe. I usually shred the cabbage myself as I find it tastes better but a bag of the coleslaw mix works well with a little doctoring. This recipe is a little sweeter of a coleslaw than others so if your not a fan of sweet coleslaw cut back on the sugar by adding a some sugar to the dressing and giving it a taste. This recipe calls for Dijon mustard which is different than the horseradish I usually add. I have to say it still had good flavor even without the horseradish flavor I love in a coleslaw.This recipe comes via a Mother's Day gift of Southern Plate by Christy Jordan.

Ms. Millie's Best Coleslaw
Southern Plate Christy Jordan

1 medium head green cabbage, cored and shredded (or you can use two bags of the coleslaw mix for all the veggies in this dish except the onion)
2 medium carrots, peeled and grated
1 green bell pepper, cored, seeded and diced
2 tablespoons grated onion
2 cups mayonnaise (I prefer Best Foods or Helleman, Miracle Whip doesn't work for me)
1/4 cup sugar
1/4 cup cider vinegar
2 tablespoons celery seeds
1 teaspoon salt
1/4 teaspoon black pepper
1/4 cup Dijon mustard

Place the cabbage, carrots, green pepper, and onion in a large bowl. In another bowl, mix together all the remaining ingredients, stirring to dissolve the sugar. Pour over the vegetables and toss well to combine. Cover and refrigerate for 3 to 4 hours before serving for flavors to blend.

Stumble Upon Toolbar

Thursday, May 19, 2011

Favorite Food Blogs

I'm back. I finally have time, an internet connection that seems to be working, no more computer problems (knock on wood), a new camera (broke my other), and the desire to actually cook again. I have a few recipes to share in the next week I just have to figure out how to get the pictures off my camera and onto the computer. I figure another day or two and I'll have that figured out. In the meantime here are some of my favorite blogs to read and borrow recipes from. They are in no particular order. Check them out if you haven't and feel free to introduce me to some new ones.

Mel's Kitchen Cafe
Cookin Canuck
Frieda Loves Bread
Kalyn's Kitchen
The Sisters Cafe
Pioneer Woman

Stumble Upon Toolbar

Friday, March 25, 2011

Where have I been?

To be honest I haven't done much cooking lately. We've either had take out or really simple dishes here at home. Why you may ask? Lucky for me it's not because I've been sick this year. Instead it's because 5 years after we started tearing flooring out of our dining/office/school room area and tearing off the 70's paneling and wallpaper we are almost finished. Half our walls are now painted a sunny yellow. Flooring has been bought and final choices are being made on a desk I am going to attempt to build for our computers. I will have pictures when finished to share with you. I'm so excited to get this done and to finally get back to cooking some yummy food instead of getting by on just decent food.

Stumble Upon Toolbar

Monday, February 28, 2011

Favorite Dish: Greek Chicken Wraps

This is a favorite dish in our house. It's actually really easy to put together and everyone in the house will eat all parts of it. I've posted all the recipes before but this is a better picture than I had in the original posts. You could certainly buy pita bread but why bother when this flat wrap is easy to make and better tasting than any store bought pita. We use either romaine lettuce or spinach leaves for the greens. Tomatoes and red onions are our final touches but you could add more items or less depending on what you like.

For the sauce:
1/8 cup olive oil
2 garlic cloves, minced
2 tablespoons finely chopped fresh basil
1/2 teaspoon dried oregano
2 teaspoons grated zest plus 1 tablespoon juice from one lemon
1 teaspoon salt
1/2 teaspoon pepper
1/4 teaspoon red pepper flakes
1/4 tablespoons mayonnaise
1 tablespoon red wine vinegar
Adjust these for your family's taste. I've found that this is right for our family.

Combine oil, garlic, basil, oregano, lemon zest, salt, pepper, and pepper flakes in a large bowl and whisk in mayonnaise, vinegar, and lemon juice; refrigerate.

For chicken:
Juice of 1 lemon, approximately 3 tablespoons
3 tablespoons olive oil
1 teaspoon minced garlic, about 2 medium cloves
1 teaspoon salt
1/4 teaspoon pepper
1/2 teaspoon dried oregano
1 pound chicken breasts (I usually cut really thick chicken breasts down to thin them out and make the pieces a little smaller so they absorb the marinade better)

Combine all marinade ingredients. Place chicken in a ziploc bag and pour marinade over chicken. Seal bag and place in fridge overnight. Grill (or cook in frying pan). Serve with sides of your choice or cut into bite sized pieces and add to desired recipe (I'll be sharing a few with you soon). Note: If you cut your chicken into smaller, bite-sized pieces and then marinate it, you can get away with only letting it marinate for 5 or 6 hours instead of overnight.

For the soft wrap bread:
3 to 3 1/4 cups (12 3/4 to 13 3/4 ounces) unbleached all-purpose flour
1 1/2 cups (12 ounces) boiling water
1/4 cup (1 1/2 ounces) potato flour OR 1/2 cup (5/8 ounces) potato buds or flakes (I used potato flakes)
1 1/4 teaspoons salt
2 tablespoons (7/8 ounce) vegetable oil
1 teaspoon instant yeast*

Place 2 cups of the flour into a bowl or the bucket of a bread machine. Pour the boiling water over the flour, and stir till smooth. Cover the bowl or bucket and set the mixture aside for 30 minutes.

In a separate bowl, whisk together the potato flour (or flakes or buds) and 1 cup of the remaining flour with the salt, oil and yeast. Add this to the cooled flour/water mixture, stir, then knead for several minutes (by hand, mixer or bread machine) to form a soft dough.

Note: You can allow the dough to go through the entire kneading cycle(s) in the bread machine, but it's not necessary; about a 5-minute knead in the machine, once it gets up to full kneading speed, is fine. The dough should form a ball, but will remain somewhat sticky (the dough is fairly stiff, so don't be worried - just be careful not to overflour the dough). Add additional flour only if necessary; if kneading by hand, keep your hands and work surface lightly oiled. Let the dough rise, covered, for 1 hour (a little longer is fine, I let mine rise for 2 1/2 hours).

Divide the dough into 8 pieces (each about the size of a handball, around 3 ounces), cover, and let rest for 15 to 30 minutes. Roll each piece into a 7- to 8-inch circle, and dry-fry them (fry without oil) on a griddle or frying pan over medium heat for about 1 minute per side (It took mine about 4 minutes per side so adjust for your stove and pan), until they're puffed and flecked with brown spots. Adjust the heat if they seem to be cooking either too quickly, or too slowly; cooking too quickly means they may be raw in the center, while too slowly will dry them out. Transfer the cooked breads to a wire rack, stacking them to keep them soft. Serve immediately, or cool slightly before storing in a plastic bag.

*This recipe works best with instant yeast because it dissolves during the kneading process, so you don't have to knead liquid into the dough. If you really prefer to use active dry yeast, use only 1 cup boiling water for the initial dough, dissolve the yeast in 1/4 cup warm water, and add this mixture to the dough along with the potato flour mixture. It'll be somewhat "slippery" at first, but will knead in and eventually become smooth.

Stumble Upon Toolbar

Saturday, February 19, 2011

Crossroads Food Coop Feb. 2011

Today I picked up the following:
1 half gallon Farnsworth Apple Cider
1 package bacon
1 sourdough bread loaf
6 Stone Grounds multigrain rolls
1 package Colosimo's hot Italian Sausage
1 pound carrots
1 package coleslaw mix
2 lbs broccoli
5 pears
6 apples
6 oranges
3 lbs onions
5 lbs potatoes


All for $23.85.  The produce cost me $10. The sausage $3.75. Bacon $1.85. Rolls $3.15. Bread $2.10 and the apple cider $3.
Click on this link to find out how to order.

Stumble Upon Toolbar

Wednesday, February 16, 2011

Honey Lime Chicken Enchiladas

This is a recipe that I've thought of making for a few years now but I always put it off and never make it. Well I finally got around to making them and I'm so upset I hadn't done it before. The flavors are really good and blend so well together. I was fearful of the honey and lime combo with chicken enchiladas but it really worked well. I've made these twice since I made them for the first time. I'm always finding the rotisserie chickens marked down at the store and looking for ways to use them and this recipe fits the bill. I believe the original recipe calls for flour tortillas but I much prefer corn tortillas in enchiladas. These also freeze well if your into making freezer dinners.

Honey Lime Chicken Enchiladas
Wengmama on PYP
6 T honey
4 ½ T lime juice
1 T chili powder
½ tsp garlic powder
1 lb cooked shredded chicken
10 corn tortillas
2 cups shredded Monterey jack cheese
2 10 oz cans green chili sauce
Queso Fresco to add at the end of cooking to the top

Mix sauce ingredients together with cooked chicken and let marinate for at least 30 min.
Pour ½ can of green sauce in the bottom of a 9x13 pan. Roll chicken up in tortillas with a little cheese and put in pan. When they are all rolled pour the chili sauce over top and sprinkle the rest of the cheese on top. Bake at 350 for 30 min.Sprinkle on Queso Fresco right before serving.

Stumble Upon Toolbar

Tuesday, February 8, 2011

Cowboy Dinner

I love Melanie's food blog and if you haven't checked her out you really need go look and cook her dishes. I love the fact we seem to have very similar tastes in food. It's a great relationship because I can usually find on any given night about 10 to 15 choices in a dinner. She posted this recipe a few weeks ago. I love dishes so of course I had to give it a try. I wasn't disappointed in the least. I made a few changes mainly because I was short on ground chuck and I'm really not a fan of "ground" meat. I used half the meat and doubled the beans on top of using my favorite recipe for pinto beans. Overall not one person noticed I added more beans and less meat. Plus the flavor was so good. I can't wait to make this again.

Cowboy Dinner
adapted slightly from Mel's Kitchen Cafe

Beef Mixture:1 pounds lean ground chuck
1 medium yellow onion, diced
1 teaspoon salt
1/2 teaspoon black pepper
1 cup frozen corn kernels
1 1/2 cups salsa (jarred or homemade)
3 cups pinto beans
1 cup shredded cheddar cheese

Cornbread Topping:
½ cup cornmeal
1 ½ cup flour
1/3 cup sugar
1 tablespoon baking powder
½ teaspoon salt
1/3 cup oil
2 eggs, beaten
1 ¼ cup milk

Preheat the oven to 375. Lightly grease a 9X13-inch pan and set aside.

In a large 12-inch skillet, brown the ground chuck and onion, adding the salt and pepper, over medium-high heat until the beef is no longer pink. Drain the grease from the pan. Stir in the corn, salsa, and beans. Pour the beef mixture into the prepared 9X13-inch baking pan and set aside.

For the cornbread, combine the cornmeal, flour, sugar, baking powder and salt in a medium bowl. Make a well in the center and add the oil, beaten eggs and milk. Whisk together until just moistened and no dry spots remain.

Sprinkle the cheese over the beef mixture and pour the cornbread batter over the cheese and beef mixture. Gently spread the cornbread to the edges of the pan, evening it out over the top of the casserole.

Bake for 40-45 minutes until the edges are bubbly and a toothpick inserted into the center of the cornbread comes out clean or with a few moist crumbs. Let the casserole stand for 10 minutes before serving.

Stumble Upon Toolbar

Monday, January 31, 2011

Neo-Neopolitan Pizza Dough

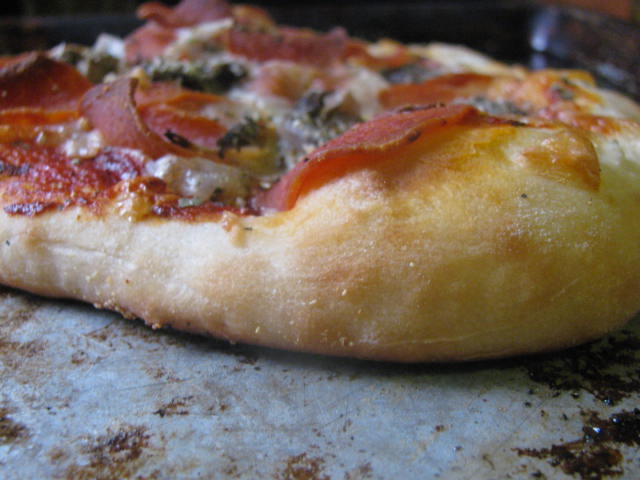
I love the idea of homemade pizza but honestly it's been hard finding a really good dough recipe. I have posted several different recipes on here in the past and yes they will make a decent dough. However I think I have finally stumbled onto what I'd consider one of the best doughs ever. An added bonus you can freeze the dough for future use. Mixing the dough was simple and easy and it requires only a few ingredients. You do need to plan ahead since it needs an overnight rest in the fridge. The dough was crisp yet chewy. I made three different types, pan pizza (which requires a longer cooking time then listed in the recipe), pizza done on a baking stone, and finally I used a cooking sheet. My favorite was on the baking stone followed by the cooking sheet. The pan pizza took forever to cook all the way through and the bottom was burned. I think my problem was I should have used less dough for the pan pizza. I also made bread sticks with the dough and they were great too.

Neo-Neopolitan Pizza DoughPeter Reinhart's Artisan Breads Every Day

5 1/3 cups (24 oz./680 g) unbleached bread flour
2 teaspoons (0.5 oz./14 g) salt or 1 tablespoon coarse kosher salt
1 teaspoon (0.11 oz./3 g) instant yeast
2 tablespoons (1 oz./ 28.5 g) sugar, or 1 1/2 tablespoons honey
2 cups plus 2 tablespoons (17 oz./ 482 g) water, at room temperature
2 tablespoons (1 oz./28.5 g) olive oil

Combine all ingredients in a mixing bowl. Using a mixer, use the paddle attachment and mix on the lowest speed for one minute. The dough should be coarse and slightly sticky. Let the dough rest for 5 minutes to fully hydrate.
Switch to the dough hook and mix on medium low speed for 2 to 3 minutes, until the dough is smoother but still soft, supple, and somewhere between tacky and sticky.
Spread 1 teaspoon of olive oil on a work surface, then use a bowl scraper to transfer dough to the oiled surface. Rub your hands with the oil on the work surface, knead the dough about 3-4 times then shape into a ball. (Note: Peter Reinhart has a different technique but I went with this simple one when I did my dough.) Divide the ball into 5 equal pieces, each weighing 8 ounces (227 g). Form each piece into a ball, then place each into a separate sandwich size freezer bag misted with spray oil. Seal the bag and refrigerate overnight or up to 4 days, or in the freezer for several months (take out at least one day before you want to make your pizza and store in the fridge).

Baking day:
About 90 minutes before you plan to bake the pizzas, place the desired number of dough balls on a lightly oiled surface. With oiled hands, stretch and round each piece into a tight ball, then place them on a pan that's been lightly oiled (preferably with olive oil). Loosely cover with plastic wrap to rest at room temperature until ready to bake.
About 1 hour before baking the pizzas, preheat the oven and baking stone as high as the oven will go. If your not using a pizza stone, assemble the pizzas on baking sheets, covered with parchment or oiled with olive oil, which is what I did. (Note: I did not preheat my other pans that I used.)

Assemble and bake:
Put about 1 cup flour in a bowl. Use some of it to dust the work surface, and your hands. Put one of the dough balls in the flour to coat the bottom. Transfer to the work surface and gently tap it down with your fingers to form a disk. Slide the backs of your hands under the dough, then lift it and begin to rotate it, using your thumbs to coax the edges of the dough into a larger circle. Don't stretch the dough with the backs of your hands or your knuckles, let your thumbs do all the work. If the dough starts to resist or shrink back, set it on the floured surface and let it rest for a minute or two. Move onto another ball. Continue working the dough and resting, as needed until it is about 10 to 12 inches in diameter. It should be thicker at the edges than in the center and the center should be thin but not paper thin. If the dough rips, you can try to patch it or you can form it back into a ball, move on to another dough ball, and try again in 15 to 20 minutes. (Note: I had kids helping me and mine were not done perfectly, in fact the kids rolled the dough with rolling pins. Don't stress if it doesn't work with the directions just find a method, like the rolling pin, that works for you. No one could tell which one I had done with my hands and which I had rolled.)
When the crust is ready to be topped transfer it to the cooking pan. Place flour on the stone or oil your pans. Top the pizza as desired and slide it into the oven.
Bake for about 4 minutes, then turn the pan around. It can take another 5 to 7 minutes for the pizza to fully cook. The edges should puff up and be a golden brown, perhaps even slightly charred (which adds loads of flavor surprisingly).
Remove pizza, garnish as desired, then let it cool for 1 minute before slicing or serving.

Stumble Upon Toolbar

Saturday, January 29, 2011

No Bake Peanut Butter Crunch Bars

I noticed this recipe and thought was a perfect solution to my desire to have granola bars on hand. I hate coconut and almost all commercially available bars have coconut in them. The thing I really love about this recipe is you can switch ingredients with others and have hundreds of options available. I used cereals that were whole grain but if you could use regular cereal if you'd prefer and still have granola bars that are less sugary then the ones you buy at the store. Also you can leave the nuts out if you want or sub another type. I've made this with cashews, macadamia nuts, and almonds. Sub out the peanut butter for almond butter or hazelnut butter. Same thing for the dried fruit. I've used pretty much every type out there and it still tastes great. Plus these are easy to make for something that tastes much better than store bought bars.

No Bake Peanut Butter Crunch Bars
Women's Day Magazine Sept. 2010

2 cups slightly crushed whole grain flake cereal
2 cups whole grain puffed rice cereal
1 cup dried fruit of your choice (cranberry is what the original recipe calls for)
1/2 cup unsalted nuts of your choice (cocktail nuts is what the original recipe calls for)
1/2 cup natural peanut butter (or any butter of your choice, the original recipe calls for reduced fat peanut butter but I much prefer the more healthy natural kind)
1/2 cup packed light brown sugar
1/2 cup honey
1 Tablespoon unsalted butter

Line a 13 by 9 inch baking pan with nonstick foil (let the foil extend about 2 inches above pan at both ends).
Mix cereals, fruit, and nuts in a large bowl.
Mix peanut butter, sugar, honey and butter in 2 qt. saucepan. Bring to a boil over medium high heat, stirring constantly; simmer for 1 minute.
Immediately stir into cereal mixture tossing to evenly coat. Coat hands with cooking spray, then use them to spread and press the mixture in prepared pan.  Chill until firm, about one hour.
Holding foil by ends, lift from pan onto a cutting board. Carefully cut lengthwise in 4 strips and then cut each strip in 6; remove foil.

Stumble Upon Toolbar

Friday, January 28, 2011

Broccoli with Cheese Sauce

I love broccoli with cheese. I don't think I've ever passed up the dish or the soup. There is just something about it that draws me to it. However I usually have or are served a mixture of glop with cheese when it comes to broccoli with cheese sauce. The frozen versions are not worth purchasing even if they are free. Well lucky for me Cook's Country made a dish that far exceeds my expectations in broccoli with cheese sauce. An added bonus is it was really quite easy to make. Yes it takes longer than the frozen version but the taste is so far superior I don't think you could ever eat the frozen version again.

Broccoli with Cheese Sauce
Cook's Country Magazine Feb./March 2011

2 pounds broccoli, florets cut into 1 inch pieces, stems peeled and cut into 1/2 inch pieces
2 tablespoons vegetable oil
salt and pepper
1 tablespoon unsalted butter
4 teaspoons all purpose flour
1/4 teaspoon dry mustard
1/8 teaspoon cayenne pepper
1 cup half and half
1/2 cup water
1/2 cup shredded Monterey Jack cheese
1/2 cup sharp cheddar cheese
1/4 cup grated Parmesan cheese

Adjust oven rack to lower middle position, place rimmed baking sheet on rack, and heat oven to 450 degrees.
After 15 minutes, toss broccoli, oil, 3/4 teaspoon salt and 1/4 teaspoon pepper in a large bowl. Arrange broccoli in single layer on hot baking sheet. Bake until spotty brown, 15 to 18 minutes, stirring halfway through cooking.
Meanwhile, melt butter in medium saucepan over medium heat. Add flour, mustard, and cayenne and cook, stirring constantly, until golden and fragrant, about 1 minute. Slowly whisk in half and half and water and bring to a boil. Reduce heat to medium low and simmer until slightly thickened, 8 to 10 minutes. Off heat, whisk in Monterey Jack and cheddar, until smooth. Stir in Parmesan until smooth. Season with salt and pepper. Serve sauce over broccoli.

Stumble Upon Toolbar